This devastating cyber breach could set up these users for further hacks and even risks exposing them to attempts at identity theft—being hacked substantially increases the chance of being targeted in follow-up attacks.
In light of these worrying developments, many users are asking themselves how to keep their data safe on the world’s most popular social network. Nobody wants to be caught out when the next breach happens.
Here are some tips which should allow you to continue enjoying Facebook—while keeping your personal data safe.
How to Control Your Privacy on Facebook
The first step to take in securing a Facebook account is to take control of your privacy settings. These can be accessed by clicking the bell icon toward the top right hand corner of the screen while logged in to Facebook and then clicking on the ‘Settings’ button.
By clicking ‘Privacy’ in the left side menu you’ll be able to access the main privacy settings for some information you have shared on Facebook.
Here you can:
- Control who sees what you post on your Facebook wall.
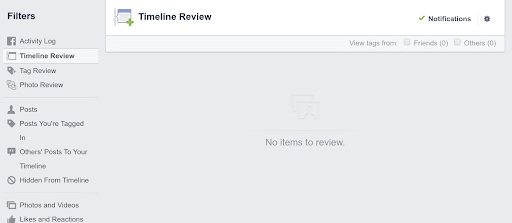
- Access the activity log, which logs every public action you take on Facebook—from liking friends’ posts through to creating your own Groups—is carefully logged. You can filter your actions by time and action type in order to easily delete things you don’t want to appear in public.
- Choose who can see particulars associated with your Facebook account, such as the email address you used to sign up for the account with.
- Select whether your profile appears in Google and other search engines.
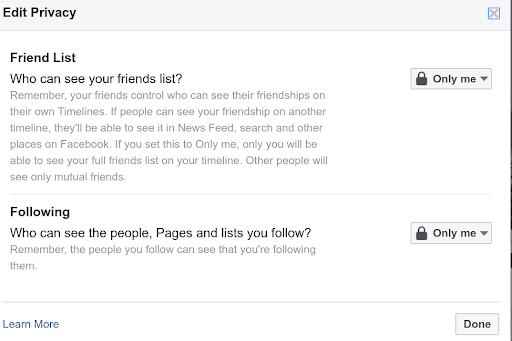
Unfortunately, Facebook’s privacy settings are not just limited to this page.
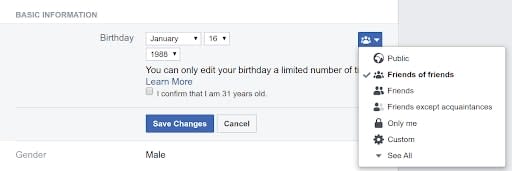
Any time you create a page or even fill out details in your personal profile you are feeding more data to the social networking giant. Clicking the ‘About’ tab in your profile, for instance, brings up an Overview screen for most users with tabs containing other information that you might have provided over the years.
By following prompts to ‘edit’ the details, users can also toggle the privacy settings applicable to that piece of information. These range from “Only Me”—which means that only the user can see the piece of information provided—to “Public”, which means that the entire world can, including those that do not have an active account on the site.
In order to control your privacy on Facebook, it’s important to use these very judiciously. Remember that the more pieces of information you make publicly accessible, the easier it’s going to be for a hacker to locate your other online profiles.
Although your password will never be publicly visible, hackers can use simple cues from the images you post to attempt to make best guesses as to what that credential might be. If you are showing your email publicly and you use the same set of credentials for every other site you are registered on (a cybersecurity no-no), then the results of a successful breach could be catastrophic.
How to Find/Collect Your Data From Facebook
If you wish to export all the data associated with your Facebook account then you can also use Facebook’s built in tools to make the process easy.
To download a copy of all your Facebook data:
- Visit Facebook.com/settingsprivacy
- Click on ‘Your Facebook Information’ in the menu on the left side of the screen
- Click ‘Download Your Information’. This will download a copy of all the information you have supplied to Facebook in the course of running your profile. You can choose the download format, select an option for the quality of media (photos, videos, etc) and select a data range to extract information for.
You can also choose to only download a certain type of information, such as Facebook posts, or simply choose to grab everything associated with the account, including comments, likes, stories, and private messages you have exchanged with other users.
If you want to keep a copy of all the information you have provided, then the safest thing to do is select all the checkboxes and choose a data range that predates the creation of the account—and which ends on the day you are taking the archive.
How to Make Yourself Unsearchable on Facebook
So you want to go the full 9 yards and make yourself totally anonymous on Facebook?
Unfortunately, that isn’t really possible.
However, there are some things you can do to make it difficult for people to find you—and even minimize the chance they will send you friend requests.
If that’s your goal, we would recommend:
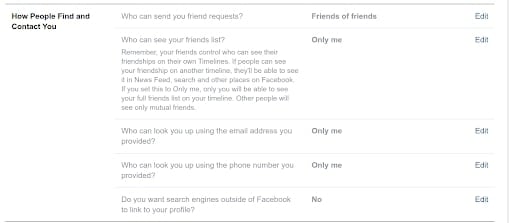
- Blocking your Facebook profile from search engines. To do this, click on “settings” in the privacy pane and then untick the box that says “Allow search engines outside of Facebook to link to your profile.”

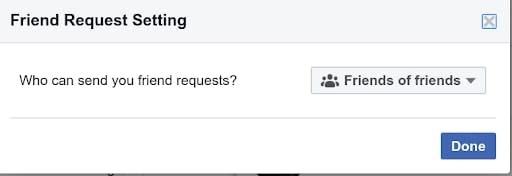
- Changing your “friend request setting.” This will alter who is able to send you friend requests. The default option is ‘everyone’ which will let anybody on Facebook send you a friend request. But you can be more restrictive and opt to limit that ability to “friends of friends.” This will make it so that only friends of your Facebook friends will even have the option to add you to their networks.
If you want to lock your Facebook profile down even further you could consider:
- Not having a profile photo or cover photo. If there are other users with the same name as you, would-be friends might find it impossible to guess which profile belongs to you.
- Blocking the profiles of people who you don’t want to connect with. This will mean that they cannot see your profile or add you as a friend—even if they are friends with your friends.
Keep Safe On Facebook
There’s no reason to panic as a result of the Facebook data breach. However, it is a good idea to be aware of what personal information you are exposing on Facebook — and to always keep your own copy of any data stored there. Follow our tips to keep safe and avoid falling victim to any future breaches that might happen.
